

Day 2: Turning a Record into a Clock - Painting!
Updated: Jul 18, 2019
I like to compare my painting process to Life. Every time I paint something, whether it be a record, a canvas, a vase, or something else, there are many, many decisions I have to make - ie: Opaque color or transparent color? Base coat or no base coat? Which pouring medium/s should I use, if any? How thick or thin should the paint be? How many colors should I use? Will specific colors blend well together or create an ugly muddiness? How long should the paint be mixed? Should I add water or no water? ...and so on and on and on.
Every choice I make has the potential for positive or negative consequences. What happens when the outcome is negative, or not exactly what I was hoping for? Preferably, I learn from the experience and make a different choice the next time. It's possible I get frustrated and stop painting for awhile (thankfully, this hasn't happened yet). Ideally, the negative, or less than favorable outcome leads to growth and learning that enhances the experience the next time. This is what learning to paint has been like for me.
Being completely self-taught, I have made many, many mistakes, spent a lot of money on products that didn't serve my purpose, scraped a lot of paint into the trash, and painted over paintings that just didn't make me "feel" anything. Fortunately I've learned a lot and I'm feeling more confident every day. I can't wait to see what I learn next!
Here is a glimpse into my process for creating two clock records:
The first step is to select the paint type and colors. Then I have to mix the paint to the right consistency based on the technique I will be using. There are between 50-100 different techniques, and I've probably tried maybe 20 of them.
Then I get to mix my colors. There are a number of additives that can be mixed with the paint, and which one is chosen depends on the desired outcome. For these two records, I chose to add Floetrol and a tiny bit of distilled water to each of my paint colors. (Floetrol helps slow the paint's drying time so I have longer to work with it, it helps to prevent the colors from blending together, and it is self-leveling.)

After mixing all of the colors, I dust the record and put a piece of tape over the hole on the under side.

Then I place the record on something to raise it off the counter, usually a soup can or tuna can.
For this post, I am doing two different techniques: the sink strainer pour and the Dutch (or blowdryer) pour.
SINK STRAINER POUR (thank you to my brother Mike for the photo documentation)
First, I put on gloves to (hopefully) keep my hands protected and clean from paint (although I ALWAYS end up with painted hands). After adding the base coat, I place my chosen sink strainer directly in the center of the record and begin pouring my mixed paint into the center, allowing it to flow out the bottom onto the record.

I continue adding colors in the order I decided until I am satisfied with the amount of paint and size of the puddle on the record.


Then I lift the strainer slightly to allow the remaining paint to run out the bottom, then I remove the strainer.

Before I begin the manipulate the paint, I allow it to sit for a few minutes to settle and for air bubbles to rise to the surface. After a few minutes I pass a butane torch across the surface to pop air bubbles (unfortunately I don't have a picture of this part, but there is on the next one).
Now it's time to start tilting the record to create the desired pattern.
To evenly cover a record with paint and keep the design intact, it's very important to move (or tilt) the paint very slowly and in a controlled manner. It takes a lot of concentration and focus. Paint will fall off the sides eventually, but it's up to the artist to decide how much paint is lost during the tilting process. (By the way, this record became VERY slippery on the bottom and I had a hard time holding on to it :-0 )


After tilting, and once I am satisfied with the design, I set the record down and use the butane torch again to pop any air bubbles that have risen to the top.
This record ended up looking completely different from how it started. In my opinion it looks like a Journey album cover. This happens a LOT though, The element of surprise is one of the most exciting parts of fluid art. I am not 100% sure that I will actually make a clock from this record. It might be too busy, I'm open to suggestions and I'm going to think about it. The next one (the Dutch Pour) will definitely be a clock though. The picture below is after it dried for several days.

DUTCH POUR (or blow dryer method)
The Dutch Pour method requires paint (of course), a blow dryer, and in my case, a tub to place the record in so paint doesn't cover my kitchen. Trust me, it's happened.
For this pour, I choose copper, orange, yellow, and a pastel green.
I first cover the record with a white base coat and I torch the base coat to remove any air bubbles.

I pour small puddles of my chosen colors on top, or to the sides, of each other, according to my preference.
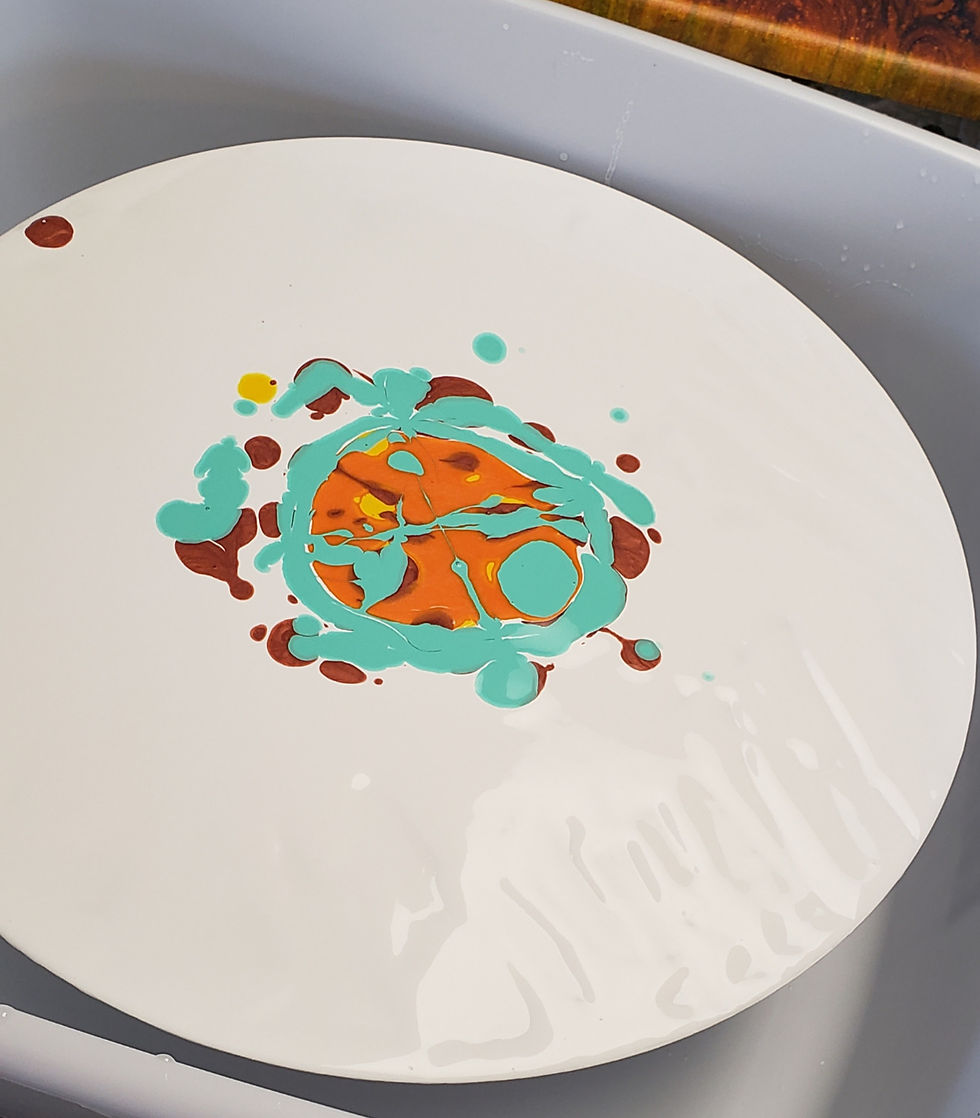
Next, I pour a wide circle of white paint around the entire puddle.

Using the blow dryer on high speed, I blow all of the white paint into the center, on top of the colored paints.


Next, I use the blow dryer to blow the paint (white and colors) from the center to the outside, all the way around the record. I try to make sure the paint goes to the edges and over.

I prefer soft lines and will sometimes use a straw, or just my breath, to soften any lines that stop short of the edge or that I just don't like for some reason.

This design was actually my second try. The first one was beautiful but I kept trying to fix different parts until it just didn't look good (to me) anymore and I ended up scraping it and starting over. My friend Elisa calls this Ungapatchka, a Hebrew word that means (loosely translated for the fluid art world) "messing with it too much until you ruin it." :)
Once I am satisfied with the (second) design, I torch again to remove bubbles, and then I walk away.

Okay, I actually move it out of the tub and check for drips occasionally. The more a piece drips, the more it pulls paint from the top so the less it drips, the better.

That's it! More on the next steps in the next post. Thanks for reading!


Comments