

Day 3: Turning a Record Into a Clock - Adding Resin! (Plus a bonus blooper story)
- Mary Veatch

- Jul 18, 2019
- 7 min read
The step that takes a painted record from 'nice' to WOW is the resin. Resin gives the surface a clear high-gloss finish that is so incredibly beautiful that I can't imagine finishing a record with anything else. (I've actually experimented with other finishes and nothing else even comes close.) I typically add between 2-5 coats of resin and the final number of coats depends on a number of factors:
I want the final result to be solid like glass, with no flexibility or bendability
I want it to be free from lint/dust/hair/etc. embedded in the resin
I want the surface to be smooth with no dips or holes
I want the edges to be completely covered
And finally, I want to be satisfied that the finish is professional and I feel proud to say I DID IT!
As I start this post, I have two disclaimers:
1. I am working on several records in various stages of the process. So that I don't have to wait weeks between posts, the records you see in the pictures below may be different than previous posts.
And 2. There are many, many different ways to apply resin, and people use the methods that work best for them. My methods may differ from other people's methods, but this is what I have found works best for me through LOTS of trial and error. I am sharing MY process. :)
In the post below, I go through the steps of applying resin as both a first coat and second/third, etc. With the exception of the first part, the application process is exactly the same.
Pre-resin step: Preparing a record for the first resin coat: (Note: The record must cure for a minimum of two weeks after being painted. For a surface with thicker paint, I will allow it to cure even longer.)
I lightly clean the cured (dried) record with isopropyl alcohol poured on a paper towel to remove any dust, oils, fingerprints, etc. It is normal for a little bit of paint to come off on the paper towel, but I use a super light touch as to not affect the design.

Pre-resin step: Preparing a record for a second (or third, etc) resin coat: EVERY SINGLE TIME before adding another layer of resin, I do the following:
I change into clothes that can get a little dirty, because...resin dust...
I take my sander, sandpaper, and drill outside to my work table (that my awesome brother John built for me)
I PUT ON A DUST MASK (it's very important not to breathe resin dust)

I use a piece of sandpaper to sand down any spots on the record that have hair, lint, etc. in the resin until I'm sure it's gone. (One time I found two paint brush bristles embedded in the resin. It took FOREVER to sand those out. I no longer use a paint brush to spread the resin.)

I drill through the resin to reopen the center hole

I use the sander with 80 grit to file down any hardened resin drips from the back side of the record (okay they're really called resin nipples but I'm going to call them resin drips)


I lightly sand the front of the record (150 -220 grit) to roughen the surface a little. This makes the resin adhere better
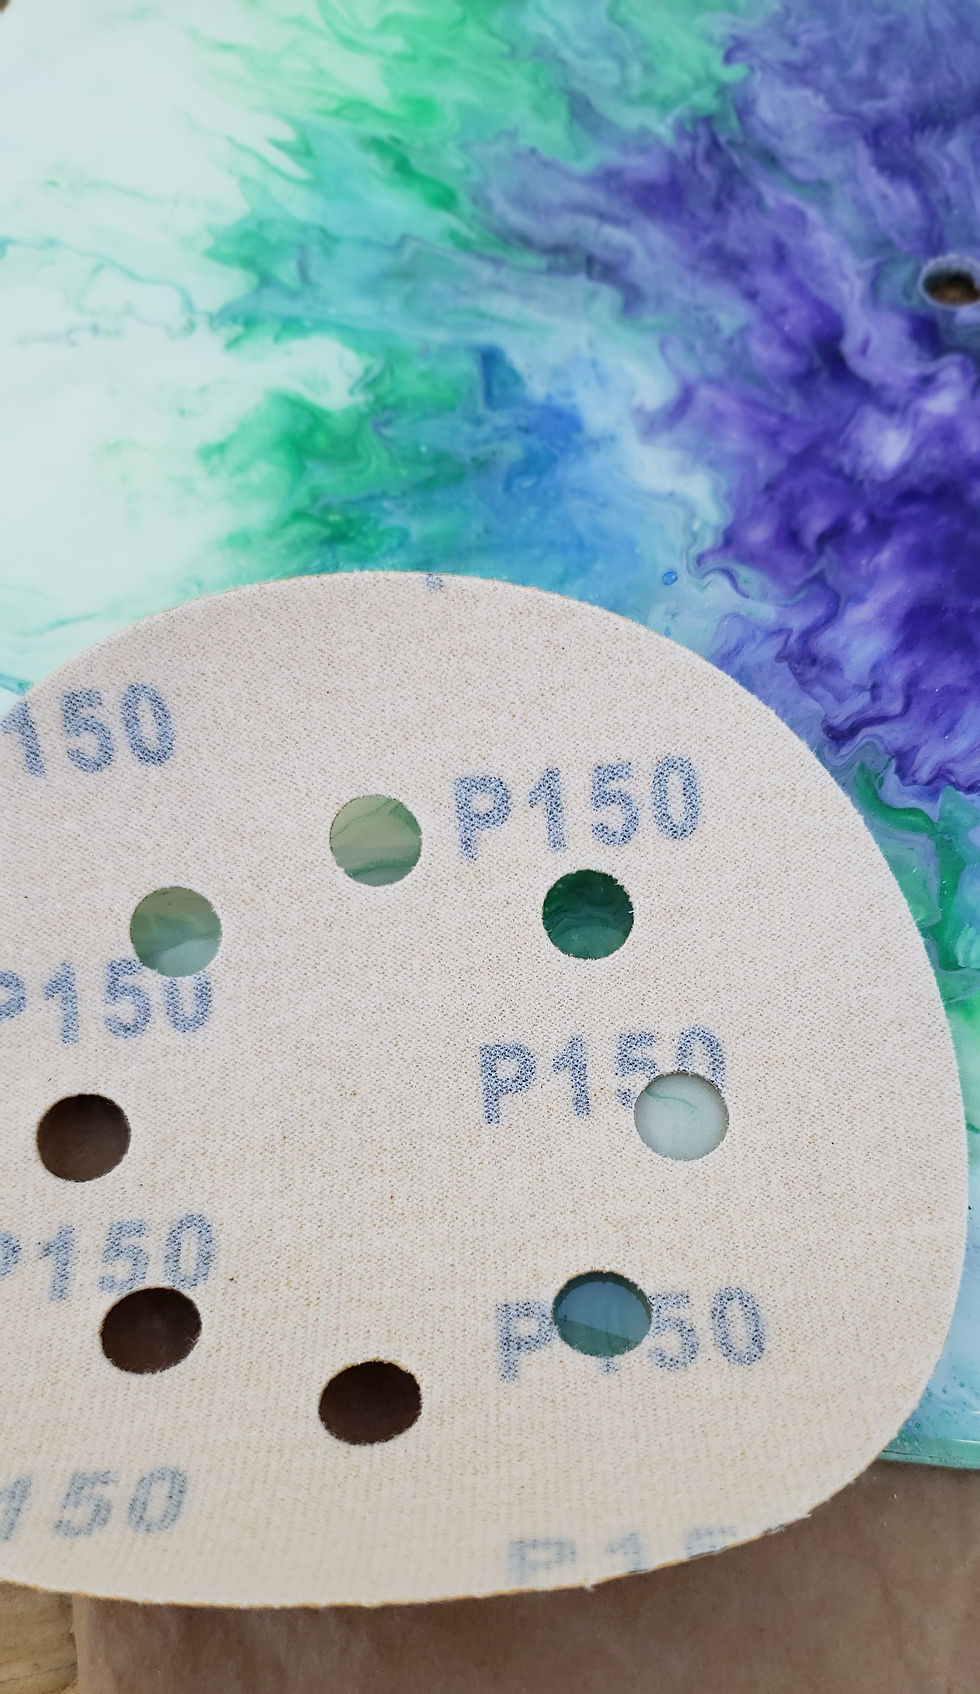
I rinse then sanded record in the sink to remove ALL of the dust and debris

Then I wipe the surface with alcohol and a paper towel to remove any fingerprints, dust, etc.
From here on the steps are exactly the same regardless of which resin layer I am applying (first, second, third, tenth :-0)
GETTING READY

I make sure all supplies are out and within reach. This includes:
Resin and activator
Measuring cup (for, you know, measuring the exact amount of resin)
2 disposable cups to mix resin and 2 disposable stir sticks (I used to use reusable cups and stir sticks for resin, but what a pain and almost impossible to clean! I ended up throwing them out and decided it was okay to use disposable for this)
2 pair of gloves (I always start wearing two pair of gloves because one always gets sticky and when it's time to torch, I can take the sticky ones off and have a clean pair to torch with)
Hand sanitizer (best for cleaning drips, hands, measuring cup, etc.)
Paper towels (I tear at least 10 off the roll to start)
Butane torch (for popping the thousands of air bubbles that rise up in the resin)
Clean pad or mat to put record on and something short to set it on (tuna can, cup, etc)
Spray bottle with water, I'll tell you why...
Then, I cover the center hole with tape on the back side of the record

IT'S TIME TO APPLY THE RESIN: Once I am sure I have all of my supplies ready - 2 pair of gloves are on my hands, hair is pulled back (because resin in hair is a nightmare), and my records are set on their stands (I use a variety of things to set the records on but they can only be a couple of inches off the ground due to the size of the cover I use - more on that later) - it's time to prepare the resin.
Side note: I usually only resin two records at a time. Resin tends to start to cure very quickly and I have about a 15-30 minute work time (depending on the brand of resin). Two records is the most I can efficiently do before the resin starts to gel.

1. MEASURE: The first step is to mix/activate the resin using equal parts of resin and hardener. Mixing resin is a VERY precise process. I cannot miss a single detail or it will affect the outcome and potentially ruin the result (ask me about this...better yet, I'll tell you a story later in this post). I use 1/3 cup of resin per record so I make exactly 2/3 cup total mixture to start so I measure EXACTLY 1/3 cup each resin and hardener and pour into a plastic cup.

2. MIX: Next, I stir and stir...and stir and stir...and stir and stir...and scrape the sides and bottom...and stir some more...and repeat. Seriously, depending on the brand of resin I use, I stir for 6 to 12 minutes. Usually I stir for about 6-8 minutes, sometimes changing cups during the mixing process.

3. POUR: Once the resin is completely mixed, it's time to work fast before it starts to set up. BUT FIRST...I spray a light mist of water into the air to remove some of the dust that may be flying around. The less dust in the air, the easier this part will be. Read on, you'll understand. After spraying the air, I pour half the resin on the first record, pouring around the edges first, then in the center. I use my stir stick to pull the resin across the record and over the edge to make sure the edges are covered, then I tilt it to assure equal coverage across the record.


4. NEXT RECORD: After I have evenly spread the resin, I let it rest for a few minutes while I pour the resin on the second record. From this point on, I'm working on both records alternating back and forth. I repeat the same steps as above for the second record.
5. TORCH: While the resin is settling on the second record, I return to the first record to use the torch to pop all of the tiny bubbles that have risen to the surface while it was resting. I torch each record two times minimum, letting it rest in between torching.

6. INSPECT, REMOVE, REPEAT: For the next approximately 30 minutes, I carefully watch and inspect the resin on both records for any dust, hairs, insects (yes it happens-especially gnats) or anything else that needs to be removed before I cover it for the next 12 hours. This is the most painstaking (and least fun) part of the entire process. It always seems like as soon as I have removed every little tiny micro fiber of dust, something else lands on it. I REALLY want everything to be removed though because otherwise, it will be embedded in the dried resin and I will have to sand it out and apply another layer. I give it them both one final torch.

7. COVER: Once all the bubbles have been popped and I don't see any more lint, hairs, etc. I will cover the resined records with plastic tubs I bought at Family Dollar for $3.50 that are the perfect size for records. Before I cover the records, I actually dust out the inside of the tubs with dusting spray. In my mind, dusting sprays helps repel dust, right? I don't know if it really helps or not, but I feel good about using it. Plus it smells good. :)

8. WALK AWAY: The resin needs to dry at least 10-12 hours so I cover them, walk away, and hope for a perfectly cured, dust free, beautiful shiny record in the morning.

STORY TIME: Okay in #1 above I promised you a story about doing things not exactly as directed. It actually happened while I was photographing for THIS blog post. I actually had 4 records total I was working on. This was the one that did NOT go as planned. Unfortunately I couldn't really photo document it, you'll understand why in a second. The picture you'll see below is not me, it's a picture I found on Google and edited to somehow try to illustrate what happened.
So.....I have this beautiful record painted a reddish rose color and I thought to myself, "wouldn't it look lovely with a layer of glitter?" OH YES that's a fantastic idea! And I know people add stuff to resin like paint, glitter, etc. AND I have some glitter glaze (intended to be used as a varnish on things, like rocks) so I had the brilliant idea to stir some of the glitter glaze INTO some of the resin (in hindsight, I should have just used glitter). So I poured half of the resin into a separate cup, and dumped some glitter glaze into it and stirred until it looked pretty well mixed, then I went back to the first record to continue my pouring, torching, inspecting, torching process. When it was time to put the resin onto record #2 (below) something terrible had happened. The glitter glaze had turned the resin into a thick, sticky, gooey mess. I could barely stir it. So I decided to just dump it on the record. What could to wrong, right? Welllll.....It was a mess. It would move. You can see in the second picture below how when I touched it with my stir stick, it just stuck to it. It was just SO thick!


So what do you do when you can't spread with a stir stick? Well, you use your hands of course! BAD IDEA...I ended up looking almost exactly like this picture:

Needless to say, the resin did not turn clear, the idea did not work out, and I'm still sanding the record trying to get the layer of dried goo off.
*****************************************************************************
My next post will show me attaching the cork backing and installing the clock hands and mechanism. Check back soon!


Mary, I am filled with awe and admiration! For your time and care, but even more for your artistic sensibility about what is beautiful and what is not. What moves you emotionally (or not) about your project once it is finished. And the patience this takes! Just wow! If I weren't so heavily invested (with time, money, space, and commitment), I would love to do this. I would also love to watch you do this. You are a true artist. By the way, can you tell me how much it would cost to own one of these gorgeous clocks? I will look forward to future posts to see what new designs you come up with. So proud of you!